This Lazarus Android Module Wizard 0.8 Ubuntu 18.04 Installation Guide has been tested on: Ubuntu Mate 18.04 64-bit Lazarus 1.8.4 64-bit GTK2 FPC 3.0.4 Lazarus Android Module Wizard 0.8 revision 754 This installation uses the combination of these software: Android NDK Revision 11c Android SDK Tools 25.2.5 (SDK API25) OpenJDK 8 Subversion, Android adb, Ant Before Start Installing You need to have Lazarus and FPC installed that have the ability to do cross compiling. […]
Category: Tutorials
Blender Cycles Image-Based Lighting Using HDRi

Last updated on 1 December 2013. Using image-based lighting (IBL) rendering technique you can easily achieve pretty good realistic render results with very few settings. There is no need to use lamps to light the scene, you just need to have a good high dynamic range (HDR) image. Glossy and glass materials usually will look convincing using image-based lighting rendering technique.
Blender 2.64 Cycles Box Projection Mapping

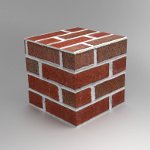
Blender 2.64 has released on October 2012, one of the great thing to know is cube projection mapping now is back in Cyles Render Engine. Cube projection mapping (also called as box projection mapping) is a simple image texturing method which is very useful for architectural rendering.
Blender Cycles Cube Projection Mapping

Blender 2.62 has been released on February 2012, one of the great thing about the release is the Cycles Render Engine was added with a number of new features. But unfortunately, the Cycles engine on Blender 2.62 still can’t do cube projection mapping. With a bit of work, we can achieve the same result as a cube projection by using some flat projections.
Create an Object Border Using GIMP

This object border is similar to Stroke Style Layer Effect in Photoshop. This simple effect is useful to make the object look cuter or to emphasize the object. It is also commonly used on texts to make them more readable.
Although this object border effect can be created easily in GIMP using Add Border plug-in, you won’t get good results. That’s why I write this step-by-step tutorial that shows you how to create an object border manually using GIMP.
Fix Red Eye using GIMP

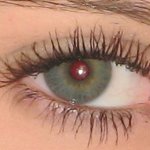
What is Red Eye Effect? Red eye effect in photography is the common appearance of red pupils of eyes that occurs when using a photographic flash. The color actually is the color of blood vessels nourishing the eye. Any bright light source may also cause this effect but only when it is positioned nearly coincidentally with the observer. This however is very difficult.
Fixed Aspect Ratio Crop Using GIMP

Aspect ratio is the proportional relationship between the width of an image and its height. All images before print should be cropped to the output aspect ratio. If you simply capture a photo and print without properly crop it, you may get unexpected stretched or cropped result done by the system automatically.
Photo Enhancement: Brightness, Contrast, Saturation

It is usually happens, photographs transferred into you computer do not give you the desired colors. It can be caused by wrong setting on your camera or some color information losses due to color conversions between devices (scanner to computer, digital camera to computer, etc). You need to photo retouch it to make it looks better. This can easily performed by using the software bundled with the device (scanner, digital camera, etc). There are also […]
Create a Seamless Image Using GIMP

A seam is a line formed by sewing together pieces of cloth. A seamless image or some may call it tileable background, can be repeated without any seam being visible because the edges of the image blend well. This step-by-step tutorial will show you how to create a seamless background. Such images are good for use as backgrounds or textures in 2D scrolling games and 3D rendering.