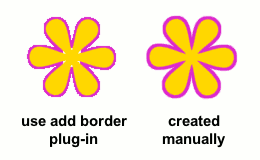
 GIMP object border is similar to Stroke Style Layer Effect in Photoshop. This simple effect is useful to make the object looks cuter or to emphasize the object. It is also commonly used on texts to make them more readable.
Although object border effect can be created easily in GIMP using Add Border plug-in, you won’t get good results. That’s why I write this step-by-step tutorial that shows you how to create an object border manually using GIMP.
Step 1
Start the GIMP and open the image, here I’m using GIMP 2.6.11.
Step 2
Make sure the layer contains the object is being active by clicking on the layer, you can see it now is highlighted.
Step 3
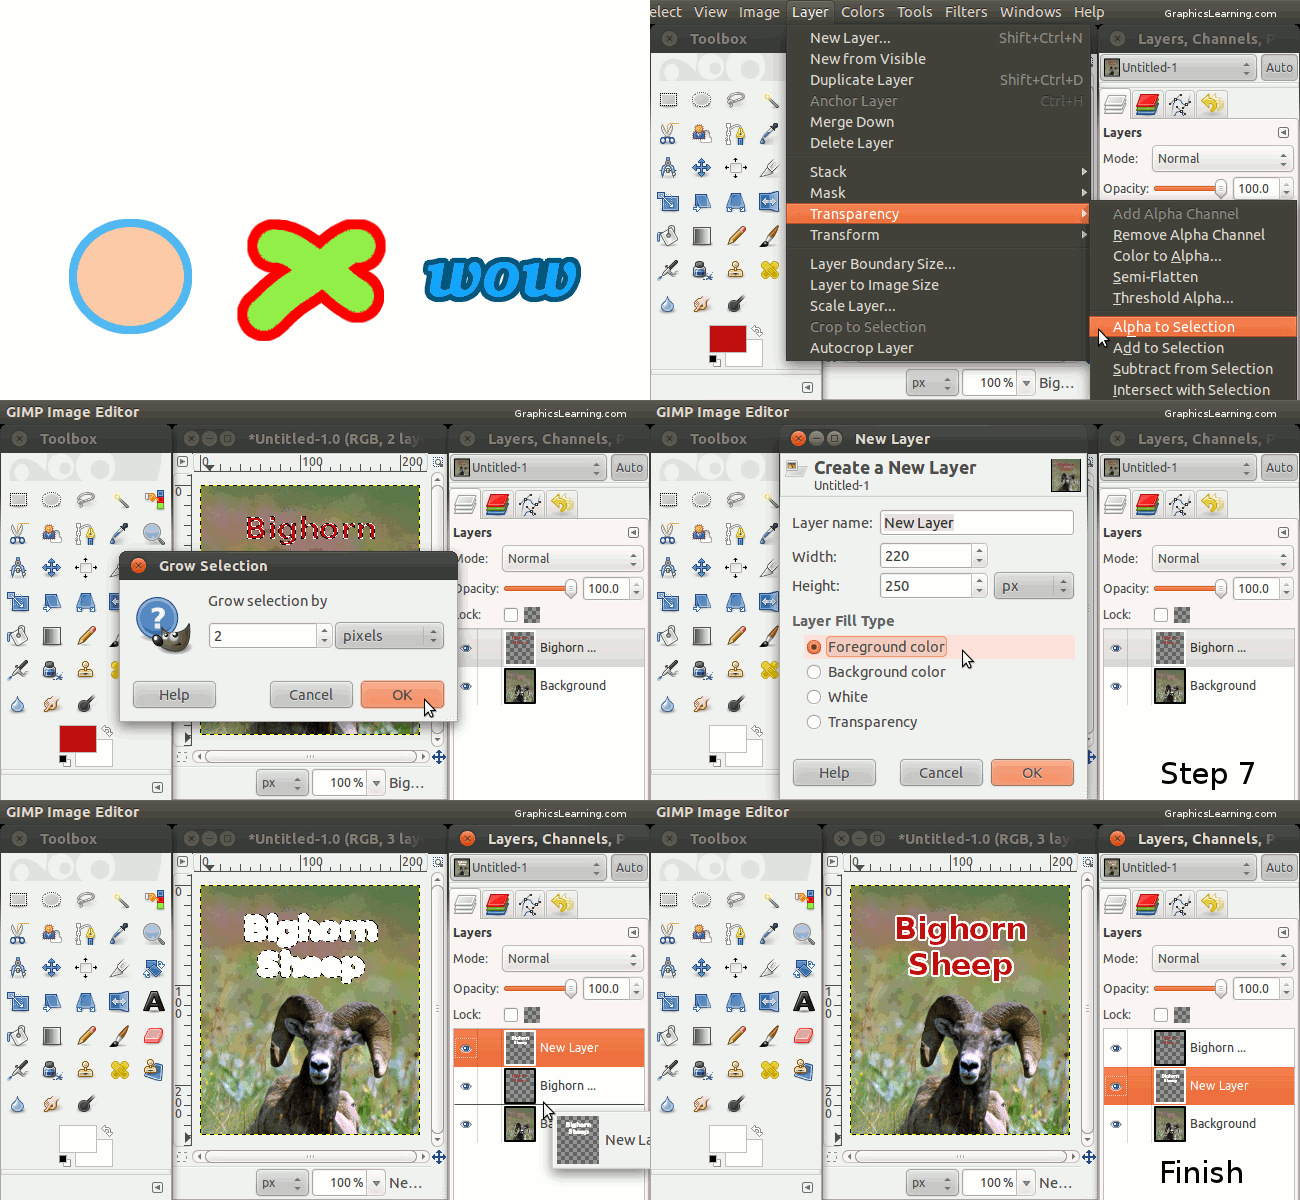
Click the “Main Menu” > “Layer” > “Transparency” > “Alpha to Selection”. It is used for making selection based on the layer’s transparency.
Step 4
The selection is exactly same size with the object, we need to make it bigger. To do it click the “Main Menu” > “Select” > “Grow…”.
Step 5
Put the size for the grow value.
Step 6
Move your mouse to the Foreground Color and double click on it to change the color to the color you want for the border. Here I’m using white.
Step 7
Create a New Layer by pressing Shift+Ctrl+N key. Make sure to select “Foreground color” for the “Layer Fill Type”.
Step 8
Now you can see the layer has been created and the selection that you have created previously.
Step 9
Invert the Selection (Ctrl+I key) and delete the selected area (Delete key) of the layer.
Step 10
Move the newly created layer (New Layer) to 1 layer below (Bighorn …). You can do it by using mouse click-and-drag on the layer.
Step 11
It’s almost done. Press Shift+Ctrl+A key to Select None.
Step 12 (Finish)
The border has been created.

I cannot tell you how long I have been looking for a way to do that. Thank you so much for this information!
You have no idea how helpful this was. i had a pretty big project coming up and your info was fantastic. Thank you!!! Very clear and VERY articulate!
Glad to know it’s helpful.
Thank you, thank you, thank you!
I am a real novice and this has helped me so much as I have just setup my own company with no money to spend and no creativity what so ever and even I can edit my company logo now and make it look good against different background colours.
You’re welcome. I’m glad it helped.